The /etc/resolv.conf is the main configuration file for the DNS name resolver library. The resolver is a set of functions in the C library that provide access to the Internet Domain Name System (DNS). The functions are configured to check entries in the /etc/hosts file, or several DNS name servers, or to use the host’s database of Network Information Service (NIS).
On modern Linux systems that use systemd (system and service manager), the DNS or name resolution services are provided to local applications via the systemd-resolved service. By default, this service has four different modes for handling the Domain name resolution and uses the systemd DNS stub file (/run/systemd/resolve/stub-resolv.conf) in the default mode of operation.
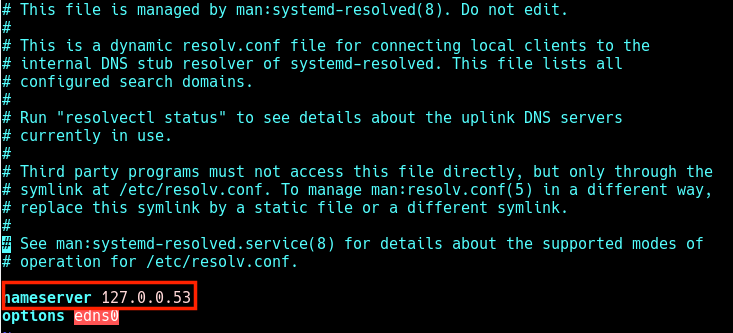
The DNS stub file contains the local stub 127.0.0.53 as the only DNS server, and it is redirected to the /etc/resolv.conf file which was used to add the name servers used by the system.
If you run the following ls command on the /etc/resolv.conf, you will see that this file is a symlink to the /run/systemd/resolve/stub-resolv.conf file.
$ ls -l /etc/resolv.conf

lrwxrwxrwx 1 root root 39 Feb 15  2019 /etc/resolv.conf -> ../run/systemd/resolve/stub-r
Unfortunately, because the /etc/resolv.conf is indirectly managed by the systemd-resolved service, and in some cases by the network service (by using initscripts or NetworkManager), any changes made manually by a user can not be saved permanently or only last for a while.
In this article, we will show how to install and use the resolvconf program to set permanent DNS name servers in /etc/resolv.conf file under Debian and Ubuntu Linux distributions.
Why Would You Want to Ddit /etc/resolv.conf File?
The main reason could be because the systems DNS settings are misconfigured or you prefer to use specific name servers or your own. The following cat command shows the default name server in the /etc/resolv.conf file on my Ubuntu system.
$ cat /etc/resolv.conf
Check DNS Name Servers
In this case, when local applications such as the APT package manager try to access FQDNs (Fully Qualified Domain Names) on the local network, the result is a “Temporary failure in name resolution” error as shown in the next screenshot.
So when a user tries to manually set the name servers, the changes do not last for long or are revoked after a reboot. To resolve this, you can install and use the reolvconf utility to make the changes permanent.
To install the resolvconf package as shown in the next section, you need to first of all manually set the following name servers in the /etc/resolv.conf file, so that you access the FQDMs of Ubuntu repository servers on the internet.
First, update the system software packages and then install resolvconf from the official repositories by running the following commands.
$ sudo apt update
$ sudo apt install resolvconf
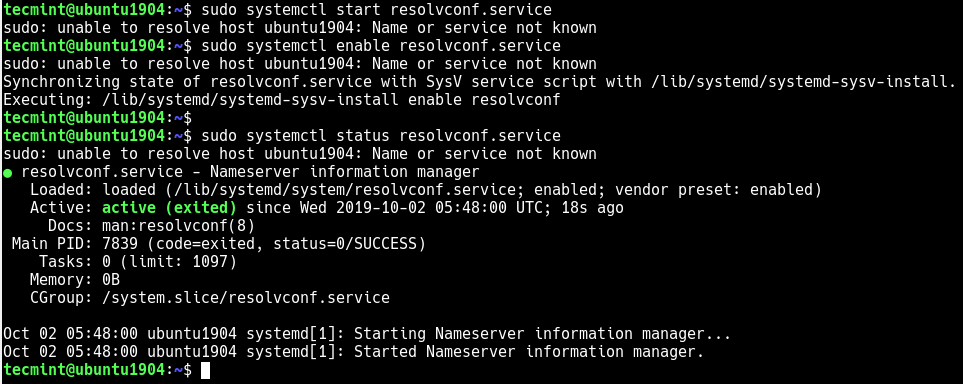
Once the resolvconf installation is complete, systemd will trigger the resolvconf.service to be automatically started and enabled. To check if it is up and running issues the following command.
$ sudo systemctl status resolvconf.service
If the service is not started and enabled automatically for any reason, you can start and enable it as follows.
Set Permanent DNS Nameservers in Ubuntu and Debian
Next, open the /etc/resolvconf/resolv.conf.d/head configuration file.
$ sudo nano /etc/resolvconf/resolv.conf.d/head
and add the following lines in it:
nameserver 8.8.8.8
nameserver 8.8.4.4
Set Permanent DNS Name Servers in Resolvconf
Save the changes and restart the resolvconf.service or reboot the system.
$ sudo systemctl start resolvconf.service
Now when you check the /etc/resolv.conf file, the name server entries should be stored there permanently. Henceforth, you will not face any issues concerning name resolution on your system.
Permanent DNS Name Servers
I hope this quick article helped you in setting the permanent DNS nameservers in your Ubuntu and Debian systems. If you have any queries or suggestions, do share it with us in the comments section below.
Once the installation finishes, the following output will be displayed:
Webmin install complete. You can now login to https://your_server_ip_or_hostname:10000/
as root with your root password, or as any user who can use sudo
to run commands as root.
To restart network interface, enter: sudo /etc/init.d/networking restart
To stop and start use the following option (do not run them over remote ssh session as you will get disconnected): sudo /etc/init.d/networking stop
sudo /etc/init.d/networking start
Debian/Ubuntu Linux with systemd, run: $ sudo systemctl restart networking
I fixed this by changing bind-address 127.0.0.1 to bind-address 0.0.0.0 in /etc/mysql/mysql.conf.d/mysqld.cnf, (so that MySQL listens on all ports).
sudo nano /etc/mysql/mysql.conf.d/mysqld.cnf
 bind-address 127.0.0.1 to bind-address 0.0.0.0

save file   exit and restart mysql

/etc/init.d/mysql restart

OK Work
You can open your messages from Gmail in other mail clients that support POP, like Microsoft Outlook.
Step 1: Make sure POP is the best way to read your emails
IMAP and POP are both ways to read your Gmail messages in other email clients.
IMAP can be used across multiple devices. Emails are synced in real time.
POP can only be used for a single computer. Emails aren’t synced in real time. Instead, they’re downloaded and you decide how often you want to download new emails.